New Home Studio
So some of you will know that when I was living in Kent I co-owned a studio with my amazing partners Gino, Dan, Dave. I left the studio a while before moving but the guys still let me use it from time to time (more precisely I think the lovely Carrie allowed me to use it from time to time.)
Since moving I have not really found anywhere to shoot from, save for one studio I found recently. Also it has been really hard to find models here. I think I may slowly be cracking the latter issue though. One model I have been talking to, really liked the shots using the fake window from the old studio, and she has kind of given me the impetus to build out a new studio in the garage.
Now I know what people are thinking, the garage is not exactly the ideal place to set up a studio in but when needs must!
The whole premise of building it is that I can have somewhere indoors to shoot but at the same time still have a garage - we are a 3 car family with a 2 car drive!
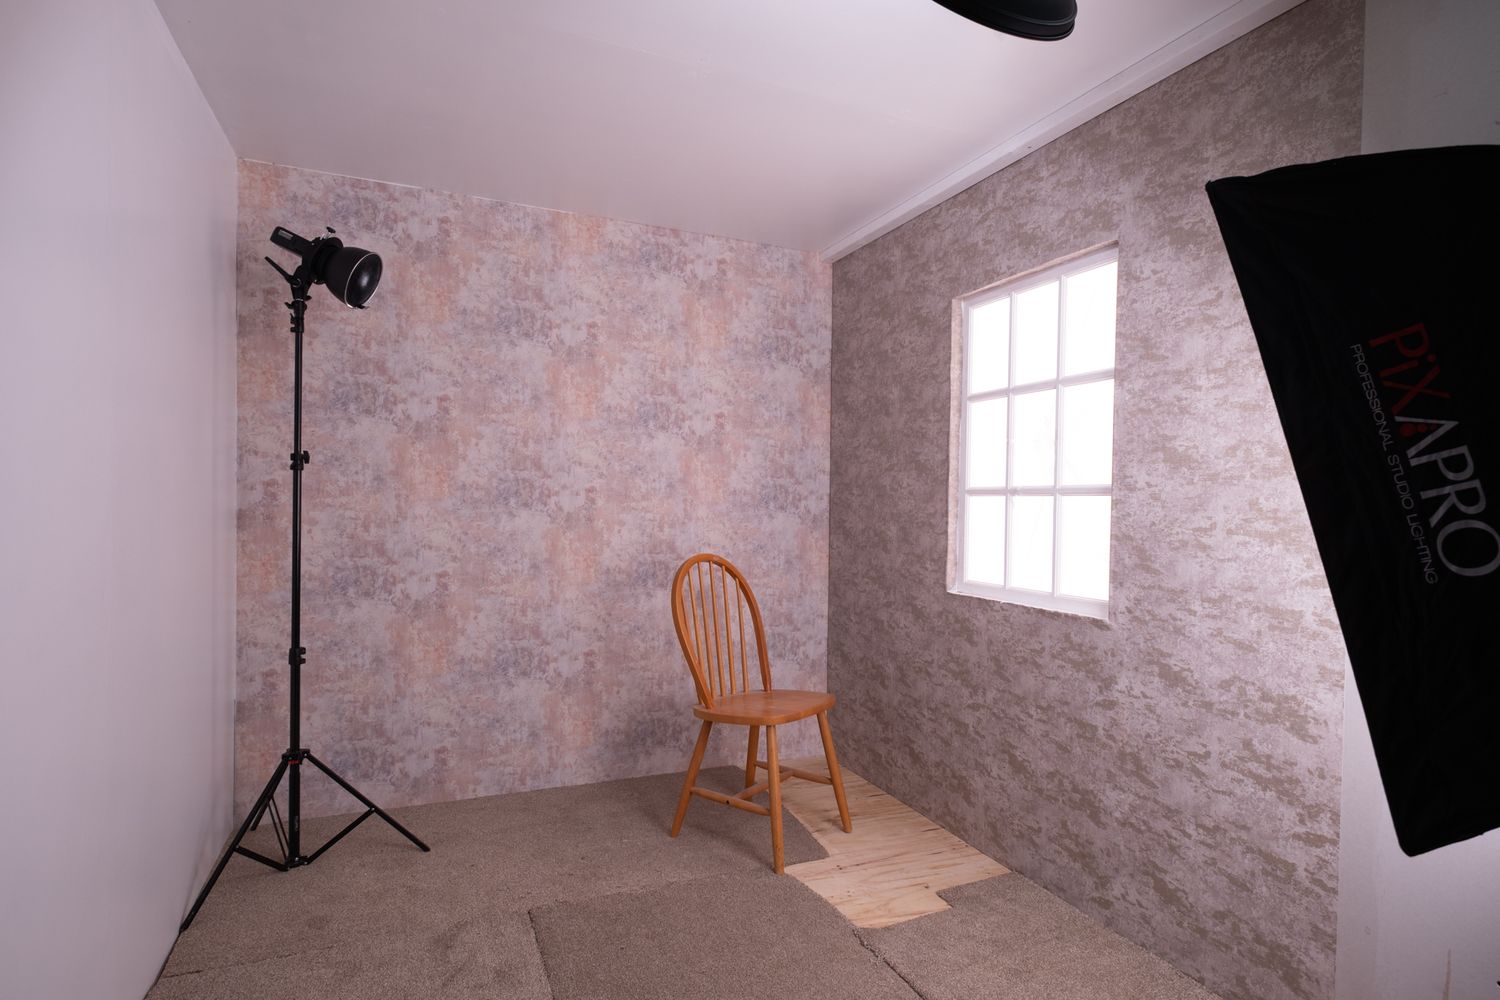
Our neighbours had a company completely fit out their garage as an office. I approached the company about getting some plasterboard put up against the back, one side wall and a small section of the ceiling. It is pointless insulating one section of the garage so a quick dot and dab job was all that was required and did not cost much.

I also got them to supply some additional plasterboard and CLS timer that I could make a false wall with. I ordered a pre-made window this time as opposed to making one myself - I am not carpenter and it probably cost not much more than the materials would have cost me anyway.


I did not want an all white studio. If I am going to put a false wall in I wanted it to look more like a room so I chose to paper it using some light pastel textured paper on one wall and a more neutral texture on the second to add some variety. I chose to leave one wall white, again for added variety, but also to bounce light off if I want to. Part of the truth though is that, after spending over £100 on wallpaper for a garage, I needed to cut some cost. I was a bit concerned that the pattern repeats rather a lot, but then thought that I would only be photographing a small part of it at any time so it should be okay. Also it should be out of focus most of the time if I am shooting properly. Depending upon the lighting, it may even be too dark to see.


The next stage in the project was to put down a false floor.
A small wooden beam runs along the ceiling from the front the flooring to the back wall which allows for the false wall, on wheels, to butt up against and be secured into place. There is just enough room behind the false wall to squeeze a 63" parabolic umbrella into, which can work as a 'daylight' source. I suspect though that more often than not, I will bounce a flash off a reflector leaning against the garage wall as it will be easy to manipulate but still give a pretty soft light.
I was given an Manfrotto autopole by a friend. I have used it across the top of the garage eaves and it allows for a light - either a beauty dish or octagonal soft box to be placed directly overhead. The autopoles are really good and I think I might get another one at some point or get a lighting bracket and attach that to the roof beams to free up the autopole for other uses.


By moving the false wall out of the way I can fit a standard 2.72m paper background roll in on 2 stands.

When I finish shooting I can unhook the false window wall and roll it back against the main garage wall. The floor can be lifted and leans against the back wall. Three bikes, a running machine and a tumble dryer can be strategically positioned so that we can still get Tina or Hannah's car in the garage. In fact, even my car, the blue whale, does actually fit in still!

The last stage in the project was to put down some vinyl flooring. I have opted for a wood flooring board effect.

In May I finally got to try it out with my first shoot since moving to Wales. The drive to complete the project was a conversation I had with a model called Nadine way back in the autumn of 2024. After seeing images on my portfolio, using the fake window in my old studio, she really liked the idea of shooting something similar. Nadine came up in May, and I was finally able to try out the new space. Overall I am really pleased with how it has turned out. Here are some of the images we managed to shoot in the space.


Here are a few lighting diagrams I have played around with to get some ideas. Click on them to enlarge the view.


